Wednesday, February 29

Carrot Thuvaiyal

My mom used to prepare this carrot chutney that goes well with hot steamed rice and ghee, it is so heavenly to have this on fasting days when the only meal is the mid-day meal. I make this mostly to accompany idli/ dosa. It has a natural sweetness from carrot and the flavor of roasted carrot itself is so good. One of my friends had recently tried this and was happy that her kids who don't eat carrots just loved it.

Ingredients:

1. Carrot – 4
2. Tamarind – a marble size
3. Red chillies - 3
4. Salt as per taste
5. Oil - 1 tsp
    For tempering:
6. Mustard seeds - 1/4 tsp
7. Curry leaves - 1 sprig
8. Urad dal - 1/2 tbsp
9. Asafoetida - 1 pinch
10. Oil - 1/2 tbsp


Method:

Step 1: Heat oil in a pan and sauté the peeled & sliced carrots until soft and keep aside


Step 2: Roast the red chillies in a same oil.

Step 3: Now put carrot, chillies, salt and tamarind into a mixer and grind coarsely using water.


Step 4: Temper with mustard seeds, urad dal, asafoetida and curry leaves


Mint Pulao

This is another simple rice variety that came as a savior during my kinder-garden stages of kitchen particularly when I invited people home for lunch or dinner. The aroma that comes when you open the cooker just masks any flaws in its cooking and it is very compatible with plain raita to complex gravies. Sometimes easy works get great recognition and this is one of them so I love to cook this simple recipe again and again.


Serves: 2
Preparation Time: 15 minutes
Cooking Time: 20 minutes

Ingredients:


1.       Mint leaves – 2 cups cleaned
2.       Green chilies – 3
3.       Garlic cloves – 5
4.       Coconut – 2” piece
5.       Ginger – 1” piece
6.       Onion – 1
7.       Cumin seeds – ½ tsp
8.       Cinnamon – 1” piece
9.       Bay leaf – 1
10.     Cloves – 2
11.   Ghee roasted cashew nuts – 1 tbsp (optional)
12.   Oil – 2 tbsp
13.  Basmati rice – 2 cups
      14.   Ghee – 1 tbsp

Method:
Step 1: Wash and soak rice for 15 minutes.
Step 2: Grind together the mint leaves, green chilies, garlic, ginger and coconut in a mixer jar into fine paste.


Step 3: Heat oil directly in the cooker, temper with: cumin seeds, bay leaf, cinnamon, cloves and sauté thinly sliced onion in it till crisp and brown.


Step 4: Add the ground paste and sauté until raw smell goes and oil starts to separate.


Step 5: Drain and add the rice and fry for 2 minutes.


Step 6: Now add enough water for the rice to cook and necessary salt.


Step 7: Mix well and close the lid to pressure cook for 2 whistles or until it is done.
Step 8: When the pressure subsides, open drizzle a spoon of ghee and mix well.
Step 9: Garnish with roasted cashew nuts and serve with raita or gravy.


TIPS:

* Amount of water and time required depends on rice you use. Use the measures that you usually use for plain steamed rice.
*You can temper only the cumin seeds in ghee and mix at the last to have the cumin seeds crispy and flavorful.
*Adding a spoon of lemon juice at the end is optional.

Tuesday, February 28

Pottukadalai Urundai


Pottukadalai or roasted Bengal gram is more prevalent in south Indian cooking especially in the inevitable coconut chutneys. So all of us have this all the time at home which means this sweet can be prepared instantly with things at home within the time taken for preparing a hot cup of tea. My granny used to give me powder pottukadalai and sugar when she ran short of snacks at home while I come from school, this is an extended version of that snack. Once my sister-in-law had sent some pottukadalai ladoos that her mom prepared; I can say this is also an inspiration from that.


Ingredients:

1. Roasted bengalgram - 1 cup
2. Sugar - 1/2 cup
3. Ghee - 1/4 cup
4. Cardamom - 4
5. Cashew nuts - 6

Method:

Step 1: Powder the roasted bengal gram and then sugar with cardamoms in a dry mixer and put them in a bowl.


Step 2: Heat a spoon of ghee and roast the broken cashew nuts in it and take them out; melt the rest of the ghee in the same pan.


Step 3: Now to the bowl with flour and sugar, add cashews and ghee.
Step 4: Mix well with a spoon.


Step 5: Roll into small balls and store in an airtight container.


Monday, February 27

Mealmaker Manchurian

As we know, soy is a major source of vegetarian protein and so my mom used to cook soy chunks or meal maker since our childhood, I am particularly fond of its chewiness when cooked and crispiness when not cooked (Yeah weird, but I used to snack on them ;)).  But for some reason, may be because it resembles meat in texture and looks, my husband does not like it at all. I buy it part of the groceries and try different recipes to feed him that; of all recipes Manchurian gave me quite a success. 


Ingredients:


1.     Meal maker - 1 cup
2.     Onion - 1
3.     Green chillies - 1
4.     Capsicum - 1
5.     Corn flour  - 2 tbsp
6.     Salt to taste
7.     Chili powder – 1tsp
8.     Pepper crushed – ¼ tsp
9.     Oil – 2 tbsp
10. Garlic – 3 cloves finely chopped
11. Ginger garlic paste – 1tsp
12. Soy sauce - 1 tsp
13. Tomato sauce – 1 tbsp
14. Vinegar – 1 tsp
15. Spring onion for garnishing (if available)

Method:

Step 1: Boil meal maker in salt water; drain and wash and rinse with cold water, squeeze out and keep aside
Step 2: Mix corn flour, salt, chili powder, pepper, ginger-garlic paste in a bowl with few drops of water to make a thin paste
Step 3: Coat the masala paste to meal maker and shallow fry them till crisp. Drain oil and keep aside.


Step 4: In the same tawa, add garlic, onion chopped, green chili, capsicum one by one in that order and sauté them for just 1 minute
Step 5: Add tomato sauce, soy sauce and adjust salt/ chilli. Sprinkle some more crushed pepper for flavor.
Step 6: Finally add fried meal maker, spring onions and toss and serve as starter. This is dry.
Step 7: If you require with gravy, before you add the meal maker add corn flour dissolved in water to the masala and stir until thick. Then add meal maker and cook for 1 min before serving.


Sunday, February 26

Ragi Laddu


This is another instant sweet for surprise guests particularly if they are health freaks. Even for a diabetes patient, this can be prepared with sugar-free substitutes. We at home are used to eating more ragi dishes as our grand-dad had diabetes; so, I generally like the color and flavor of ragi if not for health reasons also.


Ingredients:

1. Ragi powder or finger millet flour - 2 cups
2. Ghee - 3/4 cup
3. Powdered sugar - 1 cup
4. Cashew nuts - 2 tbsp
5. Cardamom powder - 1/4 tsp


Method:

Step 1: Heat a spoon of ghee and roast broken cashew nuts in it.
Step 2: Drain the cashews out and in same pan melt the rest of the ghee and fry the ragi flour till brown and aroma fill the room.
Step 3: Sprinkle the cardamom powder, mix well and remove from heat and transfer to a bowl.
Step 4: When the heat of the flour lowers a bit add the powdered sugar, roasted cashew nuts and mix well.
Step 5: Roll into laddu of required size and store in an airtight container.

Ragi Halwa


Suddenly from somewhere I got this ragi-o-mania, I started trialling with ragi flour. Once I had tried this gooey halwa which tasted very good. With generous ghee this slid into the throat like wheat halwa, even with less ghee it should’ve tasted equally good but little sticky.

Ingredients:

1. Ragi Flour - 1 cup
2. Sugar - 1 cup
3. Crushed Cardamom - 2
4. Ghee - 1/2 cup
5. Fried cashew nuts - 2 tbsp

Method:

Step 1: First mix the ragi flour with 2 cups of water in a pan and keep aside for 10 mins.
Step 2: Heat the pan, add sugar,stir it well continuously. Add ghee and stir until it thicken as halwa.
Step 3: After it get thicken add cardamom,fried cashews and mix it well.

Friday, February 24

Okra Fry


Okra fry is a classic combination with sambar or rasam or curd rice and it is equally good with phulkas. This is an easy to cook and tasty to eat side-dish that I opt usually for week-end lunches. As my husband is quite fond of okra, I make this frequently.


Serves: 3
Preparation Time: 15 minutes
Cooking Time: 15 minutes

Ingredients:

1.      Lady's finger (Okra) – 250 grams
2.    Onion – 1
3.    Lemon – 1/2
4.    Chili powder – 1 tsp
5.     Turmeric powder – 1/4 tsp
6.    Sugar – 1/2 tsp
7.     Oil – 2 tbsp
8.    Salt to taste
9.    Roasted and coarsely ground groundnuts - 3 tbsp
10.                        Mustard seeds – ½ tsp
11.  Urad dal – 1 tbsp
12.Curry leaves – 1 sprig

Method: 
Step 1: Wash and cut Okra into 1/2 inch thick pieces.
Step 2: Chop onion and curry leaves finely.
Step 3: Heat a pan, prepare the seasoning by spluttering mustard seeds, roasting urad dal and  add chopped curry leaves, onion, fry till it becomes translucent.


Step 4: Add all dry ingredients except sugar, salt and mix well.
Step 5: Put in the okra, fry for a couple of minutes; cover and keep for 3 minutes in low flame.
Step 6: Check whether Okras are cooked and if required fry for few more minutes by mixing well.
Step 7: Add sugar, lemon juice and mix well; cook for a minute more to let the tastes sweet, sour, salt, spices blend well; this will enhance the taste.
Step 8: Add groundnut powder for lifting the taste and flavour.


Step 9: Serve hot with rice or phulkas.


 TIPS:
* Cook Okra in low flame and use non-stick fry pan to consume less oil.

Thursday, February 23

Pista Kulfi

Kulfis are Indian ice-creams; they are harder, creamier, sweeter, dense in flavour compared to ice creams. As it is hard to scoop, kulfi is frozen in small serving-sized molds traditionally madka molds (earthen molds),  but in modern kitchen aluminium and plastic tumbler shaped molds are used for convenience. For the tropical climate of India kulfi are very apt as they melt down slowly. However, kulfi is a self descriptor of the phrase "No pain, no gain"; the effort of making kulfis is felt in its taste; one can definitely feel the difference between instant kulfis and those kulfis made the hard way.

Ingredients:

1. Whole milk - 1 lt
2. Sugar - 5 tbsp
3. Cardamom powder - 1 tsp
4. Pistachios - 2 tbsp

Method:

Step 1: Boil the milk with sugar in a wide pan in low to medium flame, continously stirring to avoid burning at the bottom.
Step 2: After about 45 minutes, a thick consistency of milk (almost of the thickness of beaten whole curd) is obtained. Now switch off the stove and add cardamom powder and crushed nuts.


Step 3: Let it cool down to room temperature. Stir occasionally to avoid layer formation at the top surface.


Step 4: Mix well and pour into kulti moulds and put in freezer.


Step 5: After an hour take out and stir the kulfi mix once when is partially frozen; put in freezer back. Repeat if the kulfi had not started to freeze.

Step 6: Let the kulfi set in freezer for 8 hours or better overnight.
Step 7: Before serving, take out the molds, wash in the running water with the lid closed, give it a couple of minutes to melt in the edges. Slide into serving bowls or slice them as required.
Step 8:  Garnish with more crushed nuts.

TIPS:
* You can add sweet condensed milk as a sweetner, this enhances taste and quickens the cooking.
* Some people add white bread in kulfis to give it texture and prevent icicles.
* Instant kulfis are made by adding corn starch to thicken the consistency of milk.
* Madka molds absorb the residual moisture in the kulfis and hence are rich and creamy; the material forms an insulator that slows the freezing as well as melting, price of which is a wonderful heavenly kulfi.

Wednesday, February 22

Coconut Barfi


Coconut barfi is one of my few favourite sweets but I had not learnt preparing it. I tried this recipe from internet and it did come out well; it is in fact a simpler recipe of coconut barfi. Some people like it flaky while some like it fudgy; some like it very sweet that it melts in mouth while some like it chewy; this worked well from both of our preferences.


Ingredients:

1. Grated coconut - 3 cups
2. Condense milk - 1 can
3. Sugar - 1/2 cup
4. Cardamom powder - 1/4 tsp
5. Ghee - 2 tbsp
6. Chopped almonds - 2 tbsp

Method:

Step 1: Mix grated coconut, condensed milk, sugar in a pan and keep on low heat
Step 2: When thickens add ghee and roll for few min
Step 3: Switch off and add cardamom powder and mix well.
Step 4: Pour on a greased plate and let it cool a bit
Step 5: Sprinkle almonds and cut into squares when warm and take out only when completely cool.

Tuesday, February 21

Rice Kitchadi


My mother-in-law seemed to have learnt this dish from someone long long ago. Since then eating rice Kitchadi as Sunday breakfast had been a custom in my in-law's home. I was christened into the family kitchen by learning this everyone’s-favorite dish ;) It was heavy on spice and grease for me but I got used to it and now am also a part of Kitchadi loving family. 


Serves: 2
Preparation Time: 10 minutes
Cooking Time: 20 min

Ingredients:

1. Raw rice – 1 cup
2. Tur dal – 1/3 cup
3. Turmeric powder - 2 pinches
4. Salt as required
5. Oil - 3 spoon
6. Ghee – 1 spoon
7. Fennel seeds – 1 spoon
8. Cinnamon - 1 “
9. Cardamom – 2
10. Cloves – 3
11. Bay leaf – 1
12. Tomato – 3
13. Onion – 3
14. Ginger – 3 “
15. Green chillies – 3
16. Garlic – 1 big pod

Method:

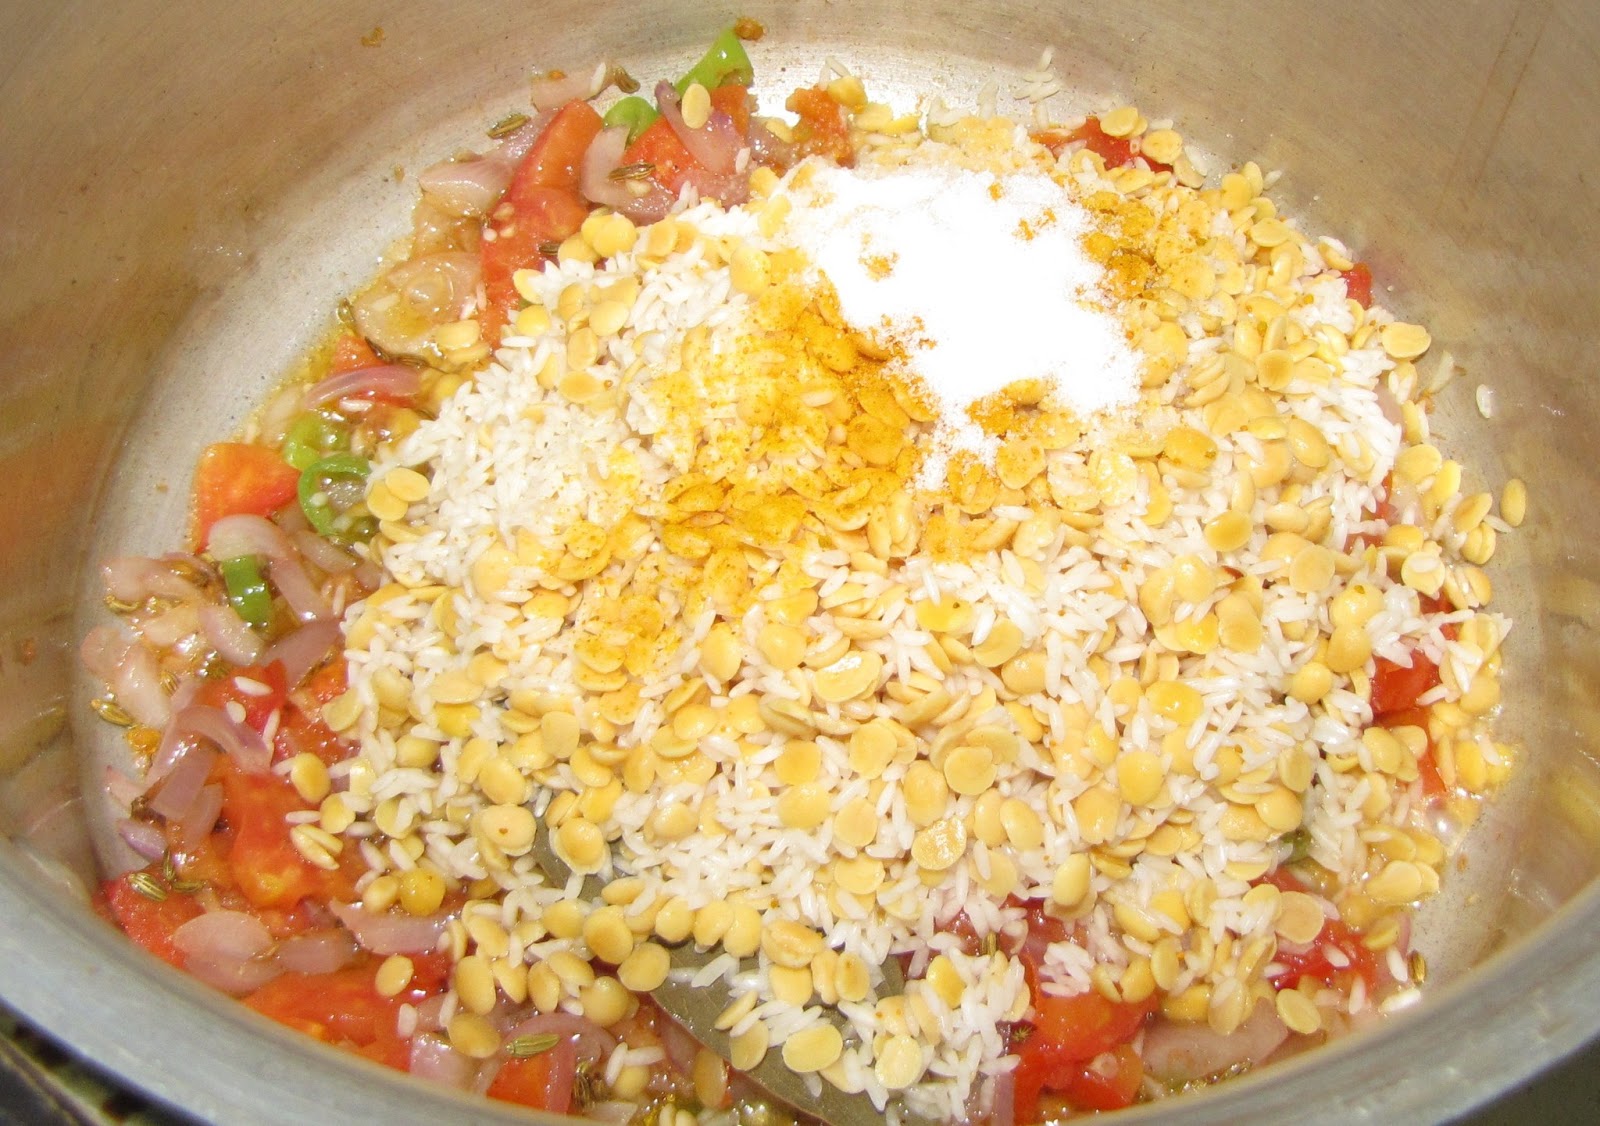
Step 1: Wash and soak rice and dal with slightly more water than required so that it cooks slightly mushy. Add to it salt and turmeric powder.
Step 2: Heat oil in a pan and temper with fennel seeds and other dry spices.


Step 3: Add onions, green chillies, ginger, tomato and sauté for few minutes.


 Step 4: Mix this to the soaked rice & dal with enough water and pressure cook for 3-4 whistles.


Step 5: Peel garlic cloves and roast them till brown in oil & ghee mix. 


Step 6: Stir in this with cooked Kitchadi and serve with plain thick curds.


Sunday, February 19

Besan Ka Puda

Chickpea flour is very rich in protein and in north I’ve heard people feeding this to babies that start eating solids. In the paying guest accommodation I stayed in, they used to prepare bread omelettes for breakfast and during those days vegetarians were served besan ka puda to replace the omelettes. I had it for the first time and was cool, huh.

Ingredients:

1. Bengal gram flour or besan – 1 cup
2. Potato grated – ½ cup
3. Onion chopped – ½ cup
4. Garam masala – 1 tsp
5. Red chilli powder – 1 tsp
6. Salt
7. Oil

Method:

Step 1: Mix all the ingredients except oil with water and make a thin dough
Step 2: Heat tawa and apply oil on it generously
Step 3: Now pour a ladle of dough on to the tawa and spread by rotating the tawa
Step 4: Roast it on low flame till done and toss it to cook other side similarly; sprinkle some more oil if required.
Step 5: Serve by sandwiching inside two raw bread slices or toasted ones
Step 6: Green chutney is a great combination with besan ka puda if had separately or even with bread, you can apply chutney on one side of bread.